🎉 Dos versiones nuevas a la vez
Salen MSXnano v2.0 y MSXimus v3.2 el mismo día, y no es casualidad: las dos máquinas comparten desde hoy la misma BIOS y el mismo firmware para el módulo WiFi. Lo que se arregla en una, se arregla en la otra.
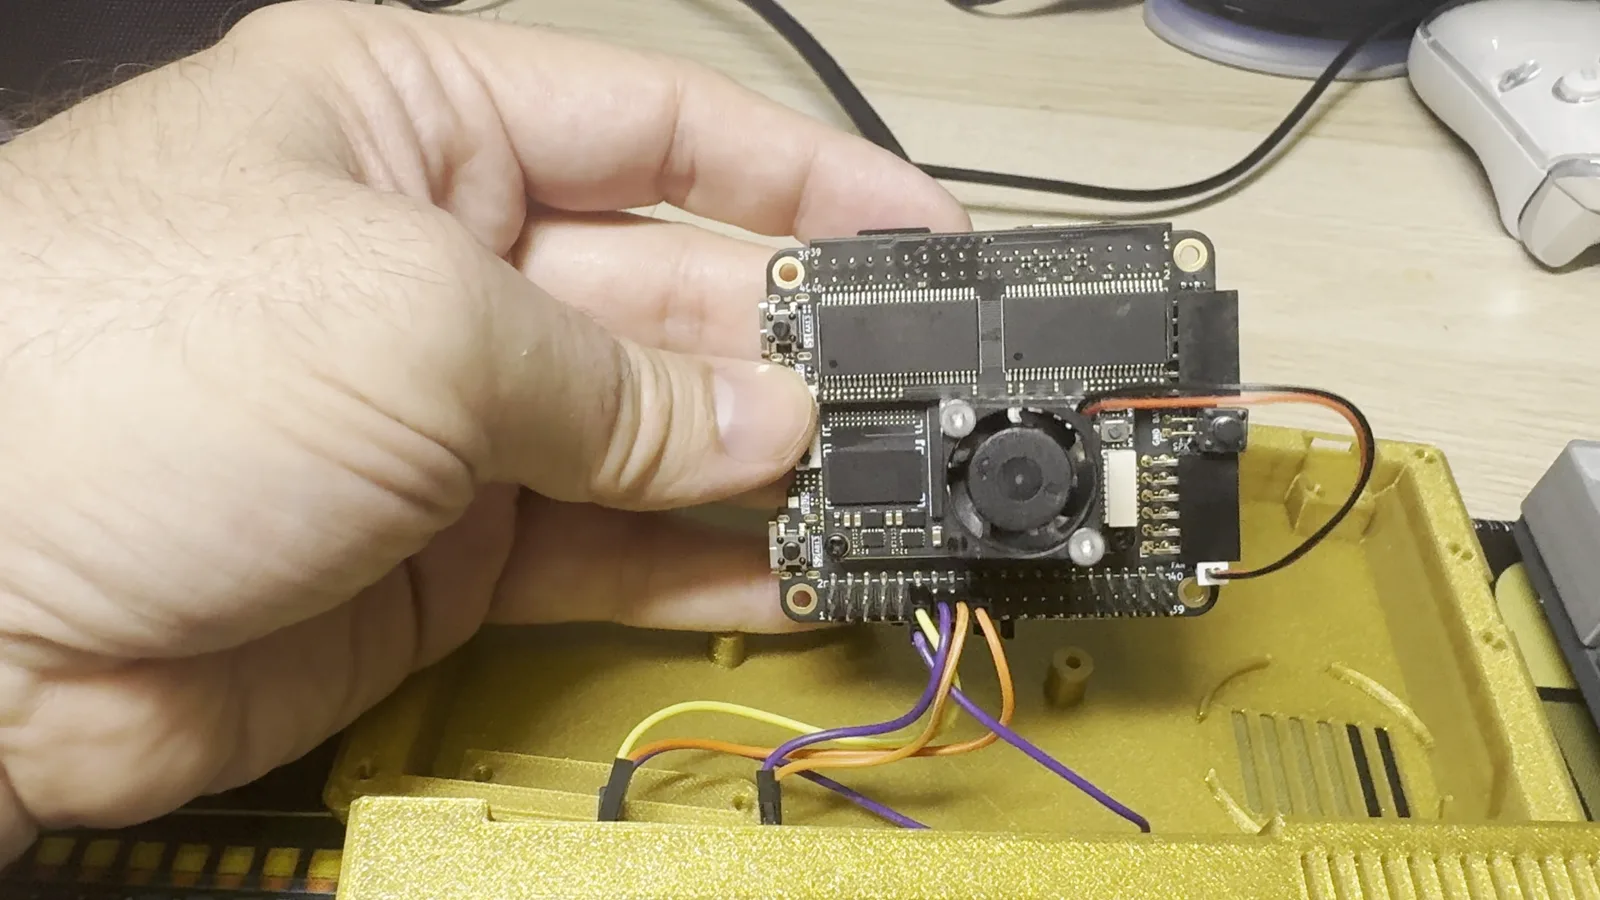
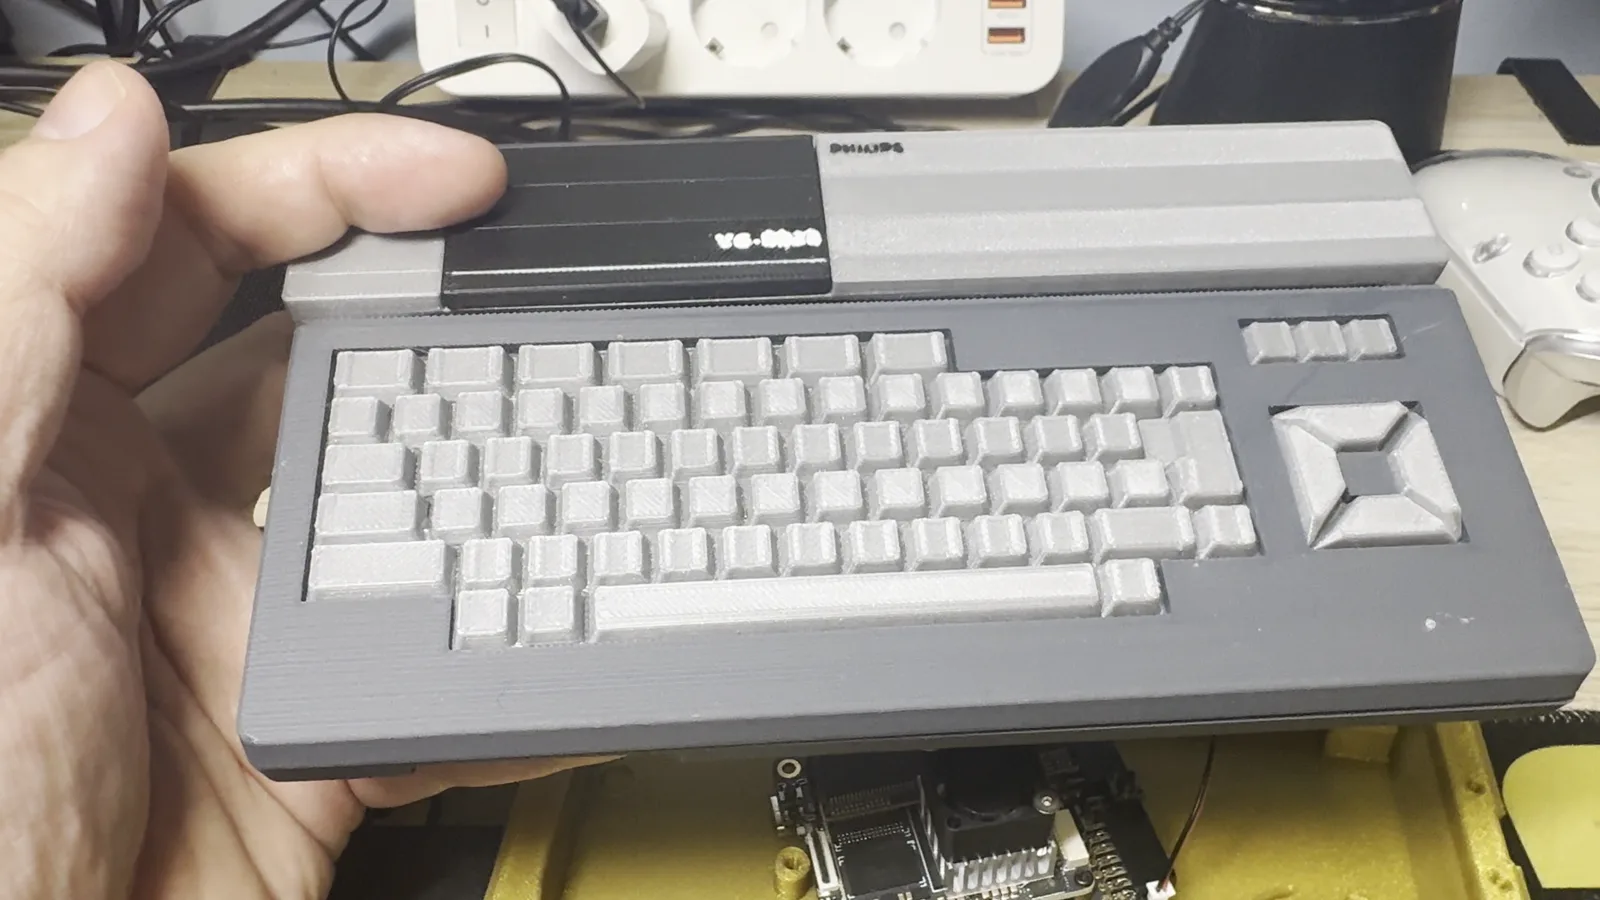
Si es tu primera vez por aquí: el MSXnano convierte una Sipeed Tang Nano 20K en un MSX2+ completo, y el MSXimus hace lo mismo con la Tang Console 60K, más potente. Z80, VDP con salida HDMI, sonido SCC y OPLL, lector SD con Nextor y WiFi opcional — todo en hardware real, sin emulador y sin necesitar un MSX original.
🕹️ MSXnano v2.0: fuera el BL616, entra una RP2040
Es el titular de la versión. El teclado y los mandos USB los servía hasta ahora el BL616 que la Tang Nano lleva soldado — y en las placas fabricadas desde 2024 (marcadas 3921) ese chip a menudo no arrancaba: te quedabas sin teclado y había que comprar un M0S Dock aparte.
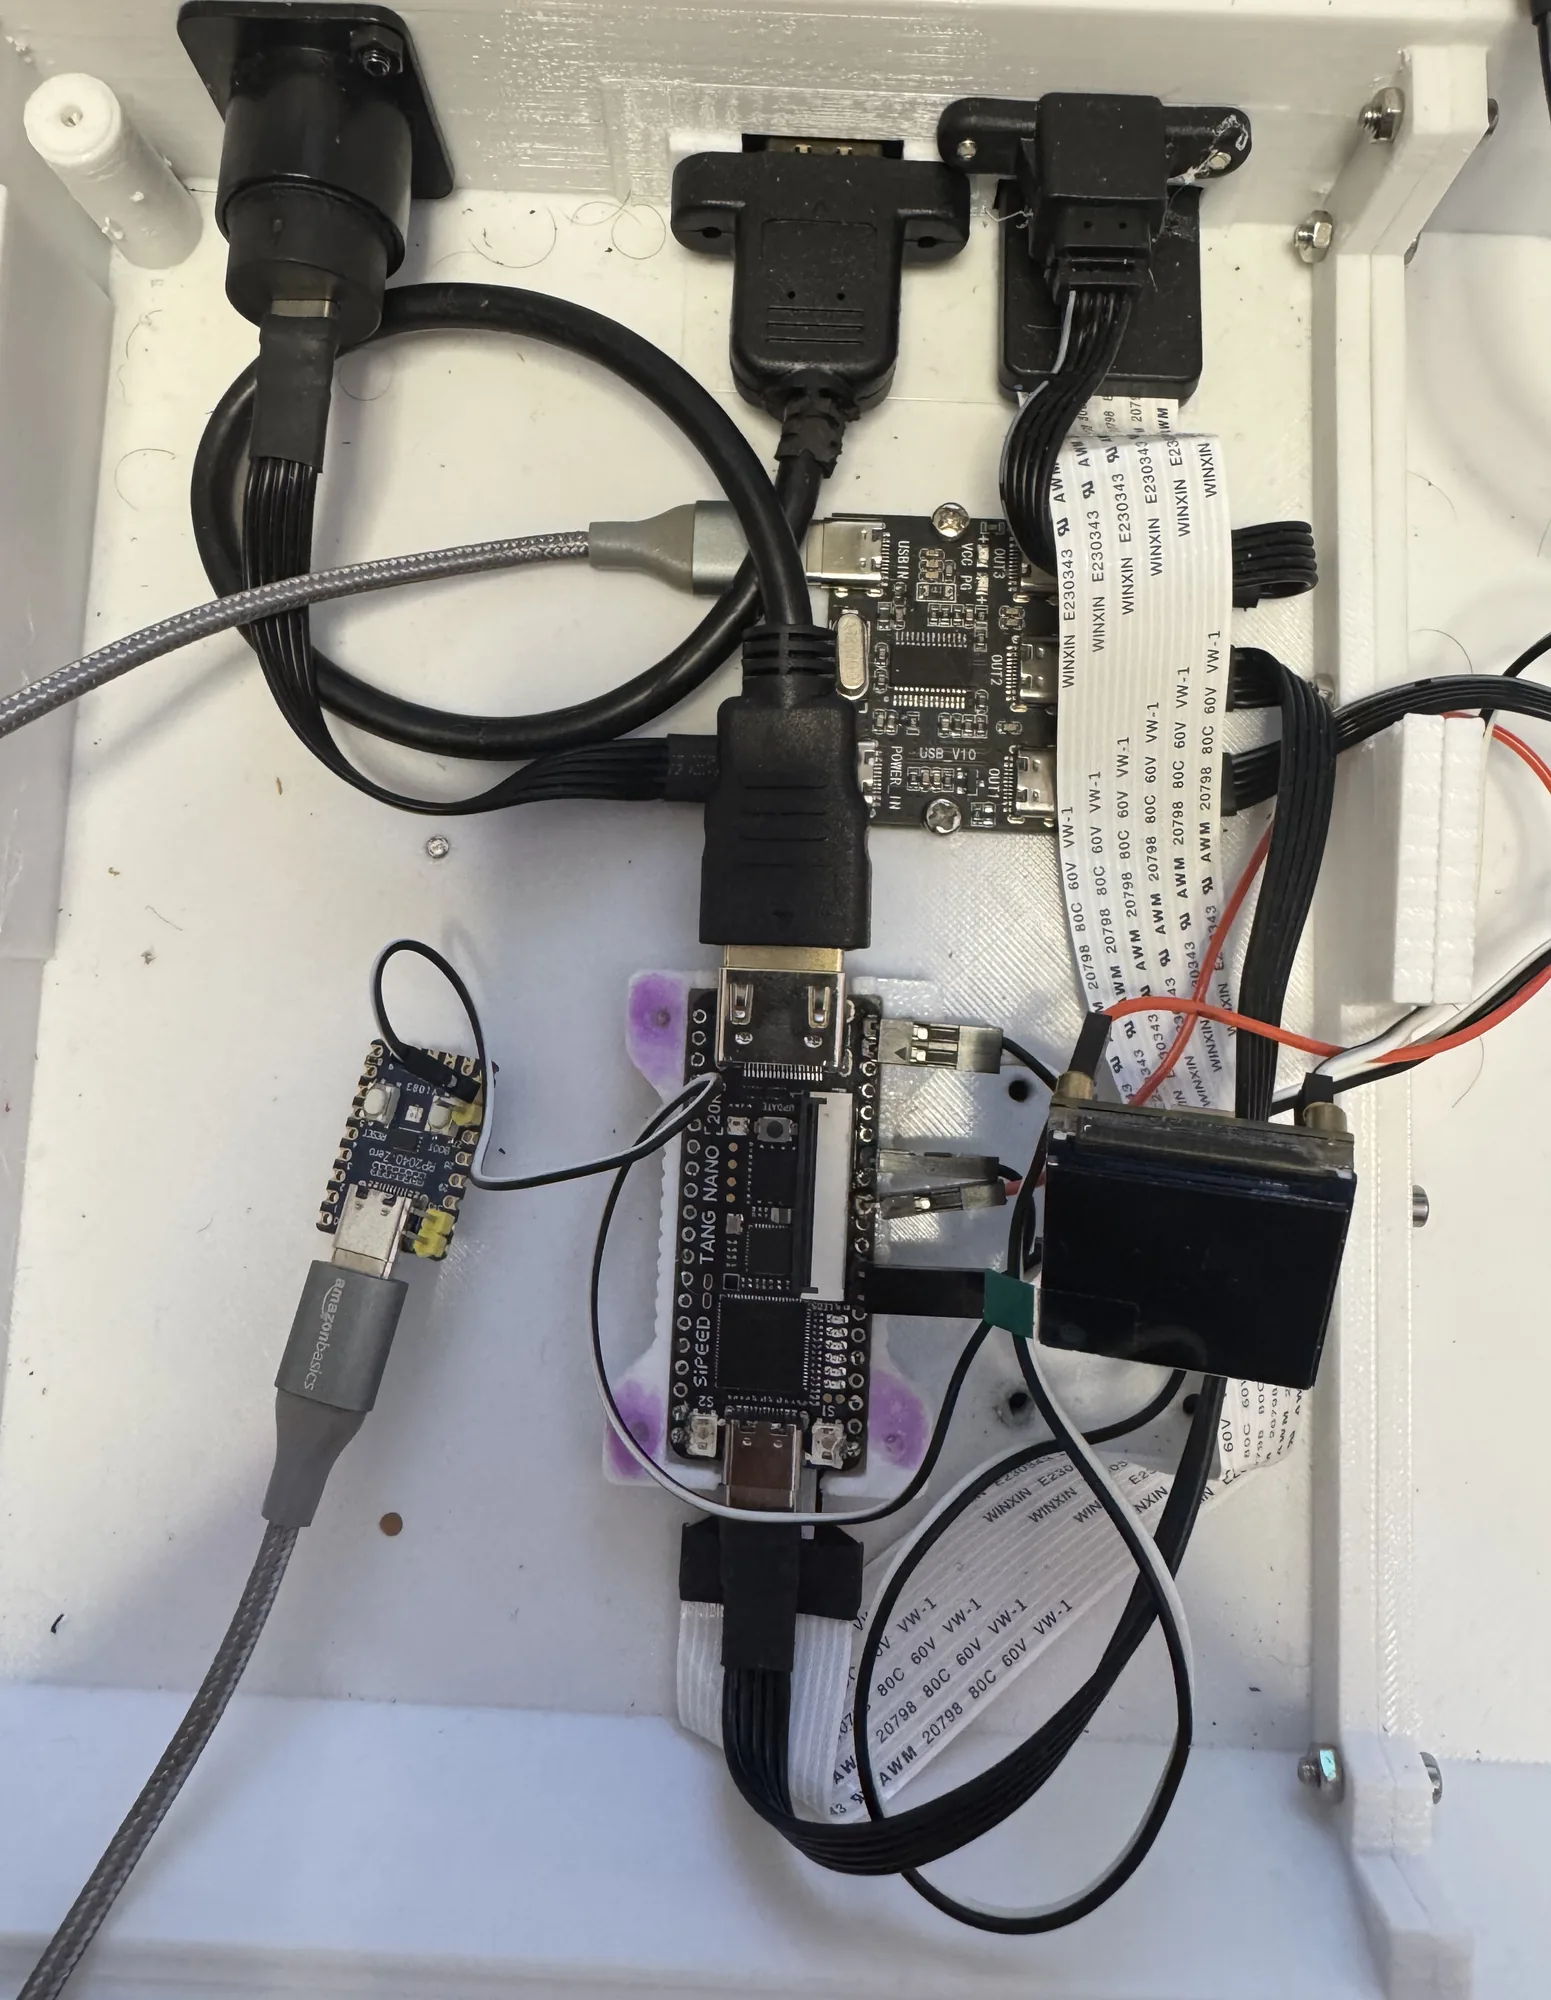
Eso se acabó. Ahora manda una RP2040 (Pico Zero) conectada con un solo cable. Todas las placas se comportan igual, sean del año que sean.
Y de regalo, lo que el BL616 nunca dio: ratón MSX. Enchufas un ratón USB a la Pico y el software MSX ve un ratón MSX de verdad.
🎛️ Una sola BIOS, y el menú es un ajuste
Esto vale para las dos máquinas. Antes había dos packs de BIOS y tenías que decidir cuál grabar: uno arrancaba el MSX directamente, el otro traía el navegador de la tarjeta. Cambiar de idea significaba volver a grabar.
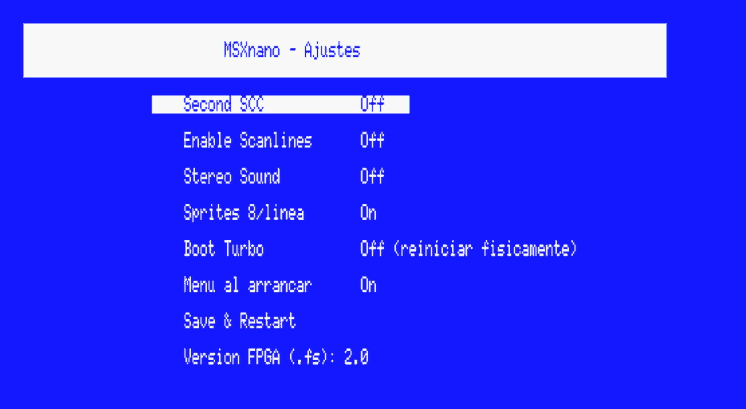
Ahora hay uno solo, y aquella elección es una casilla:
- Enciende y pulsa S mientras sale el logo.
- Marca «Menu al arrancar».
- Save & Restart.
Ya está. Para volver a la salida directa al MSX, lo desmarcas. La elección se guarda en la flash de la placa, así que sobrevive al apagón.
📥 Descargas de ROMs sin PC
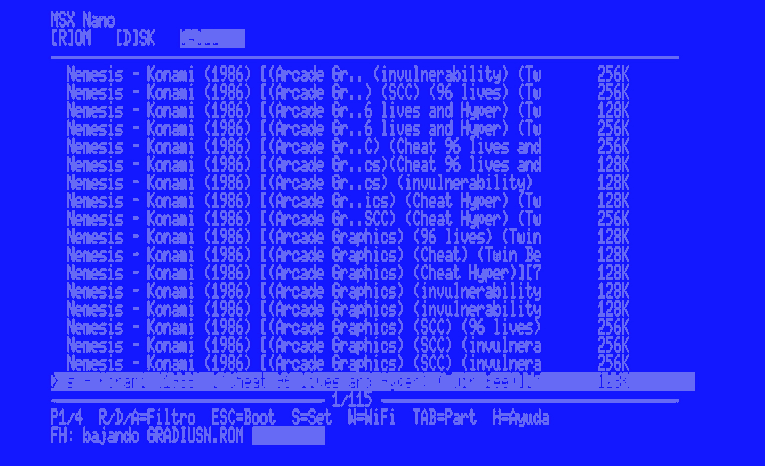
Con el WiFi puesto y el menú encendido, la tecla F abre el buscador: escribes un nombre, eliges de la lista y el fichero baja directamente a la microSD. Ni sacar la tarjeta, ni encender el ordenador.
🖥️ Pantalla opcional, y logo de arranque
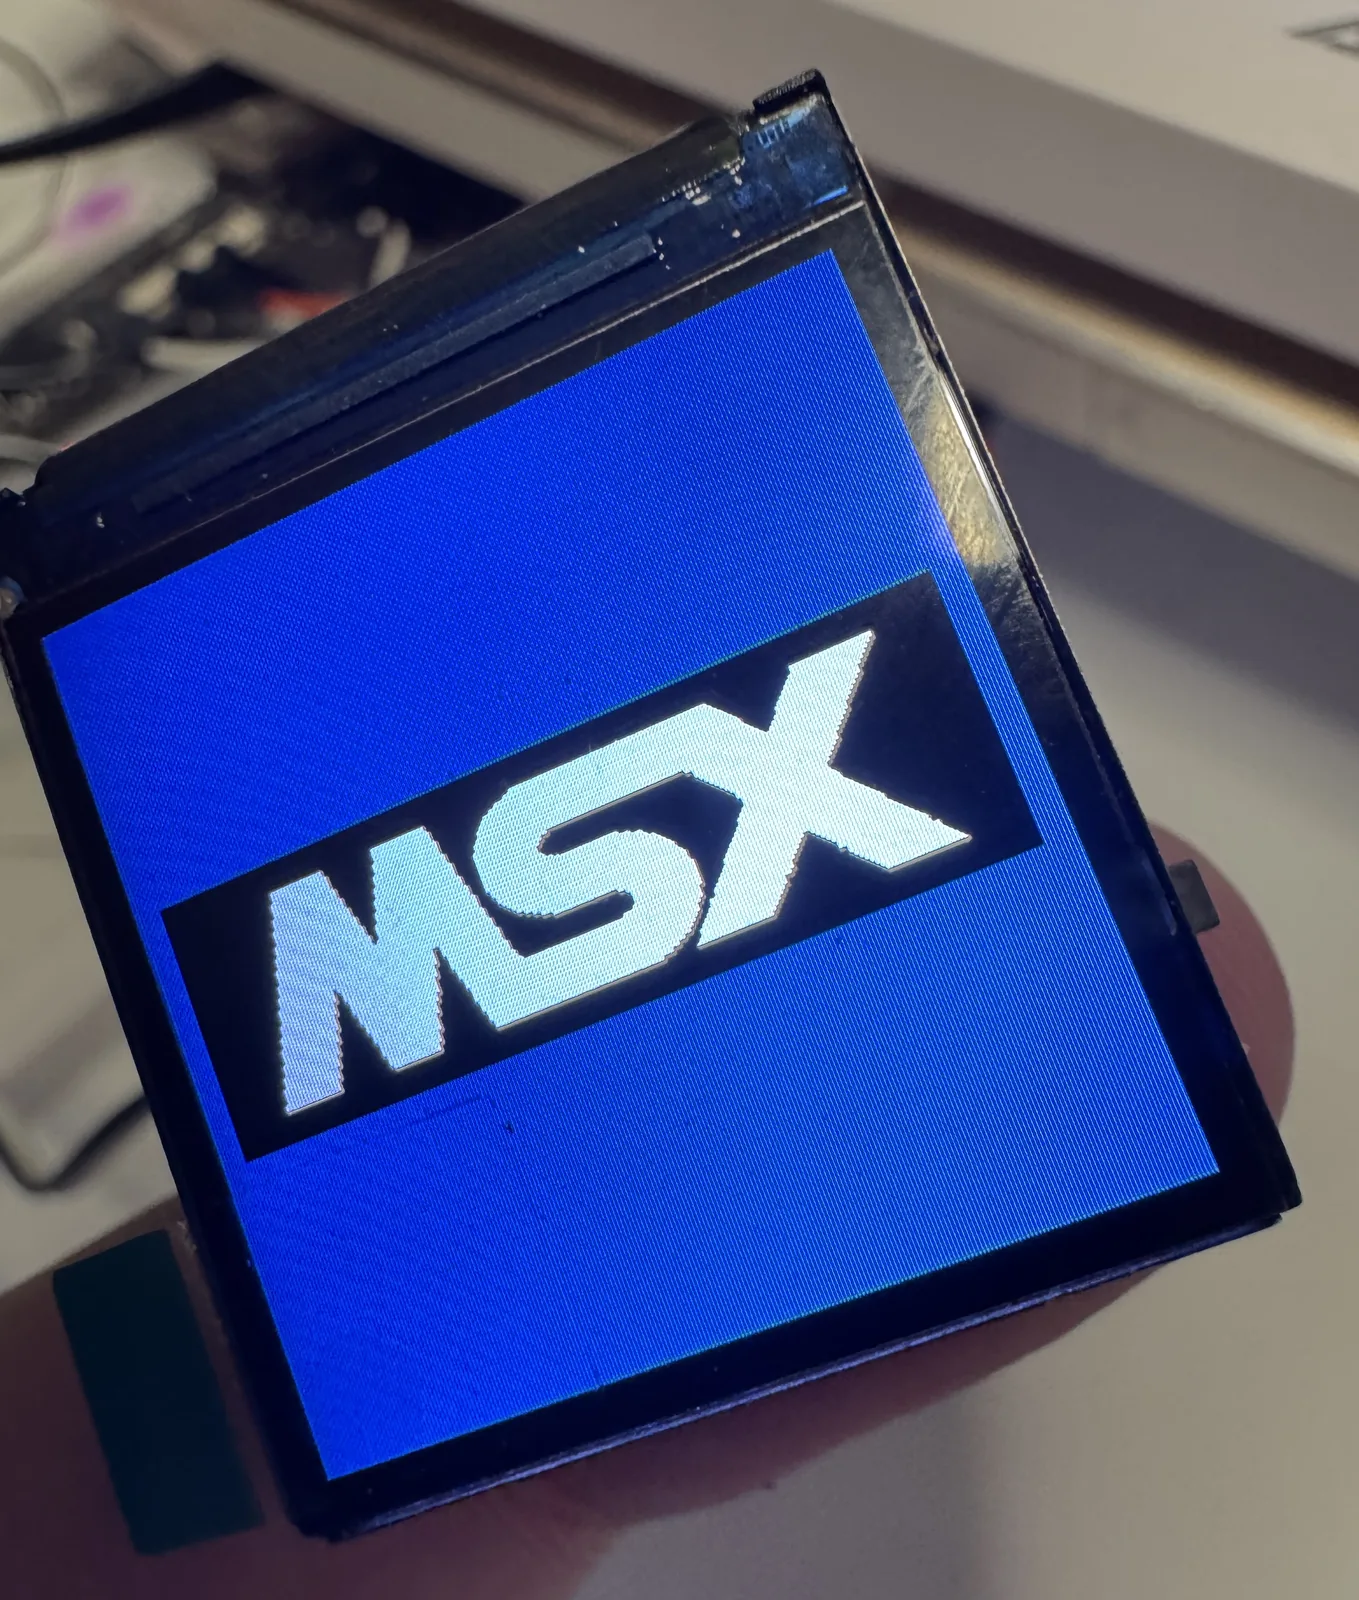
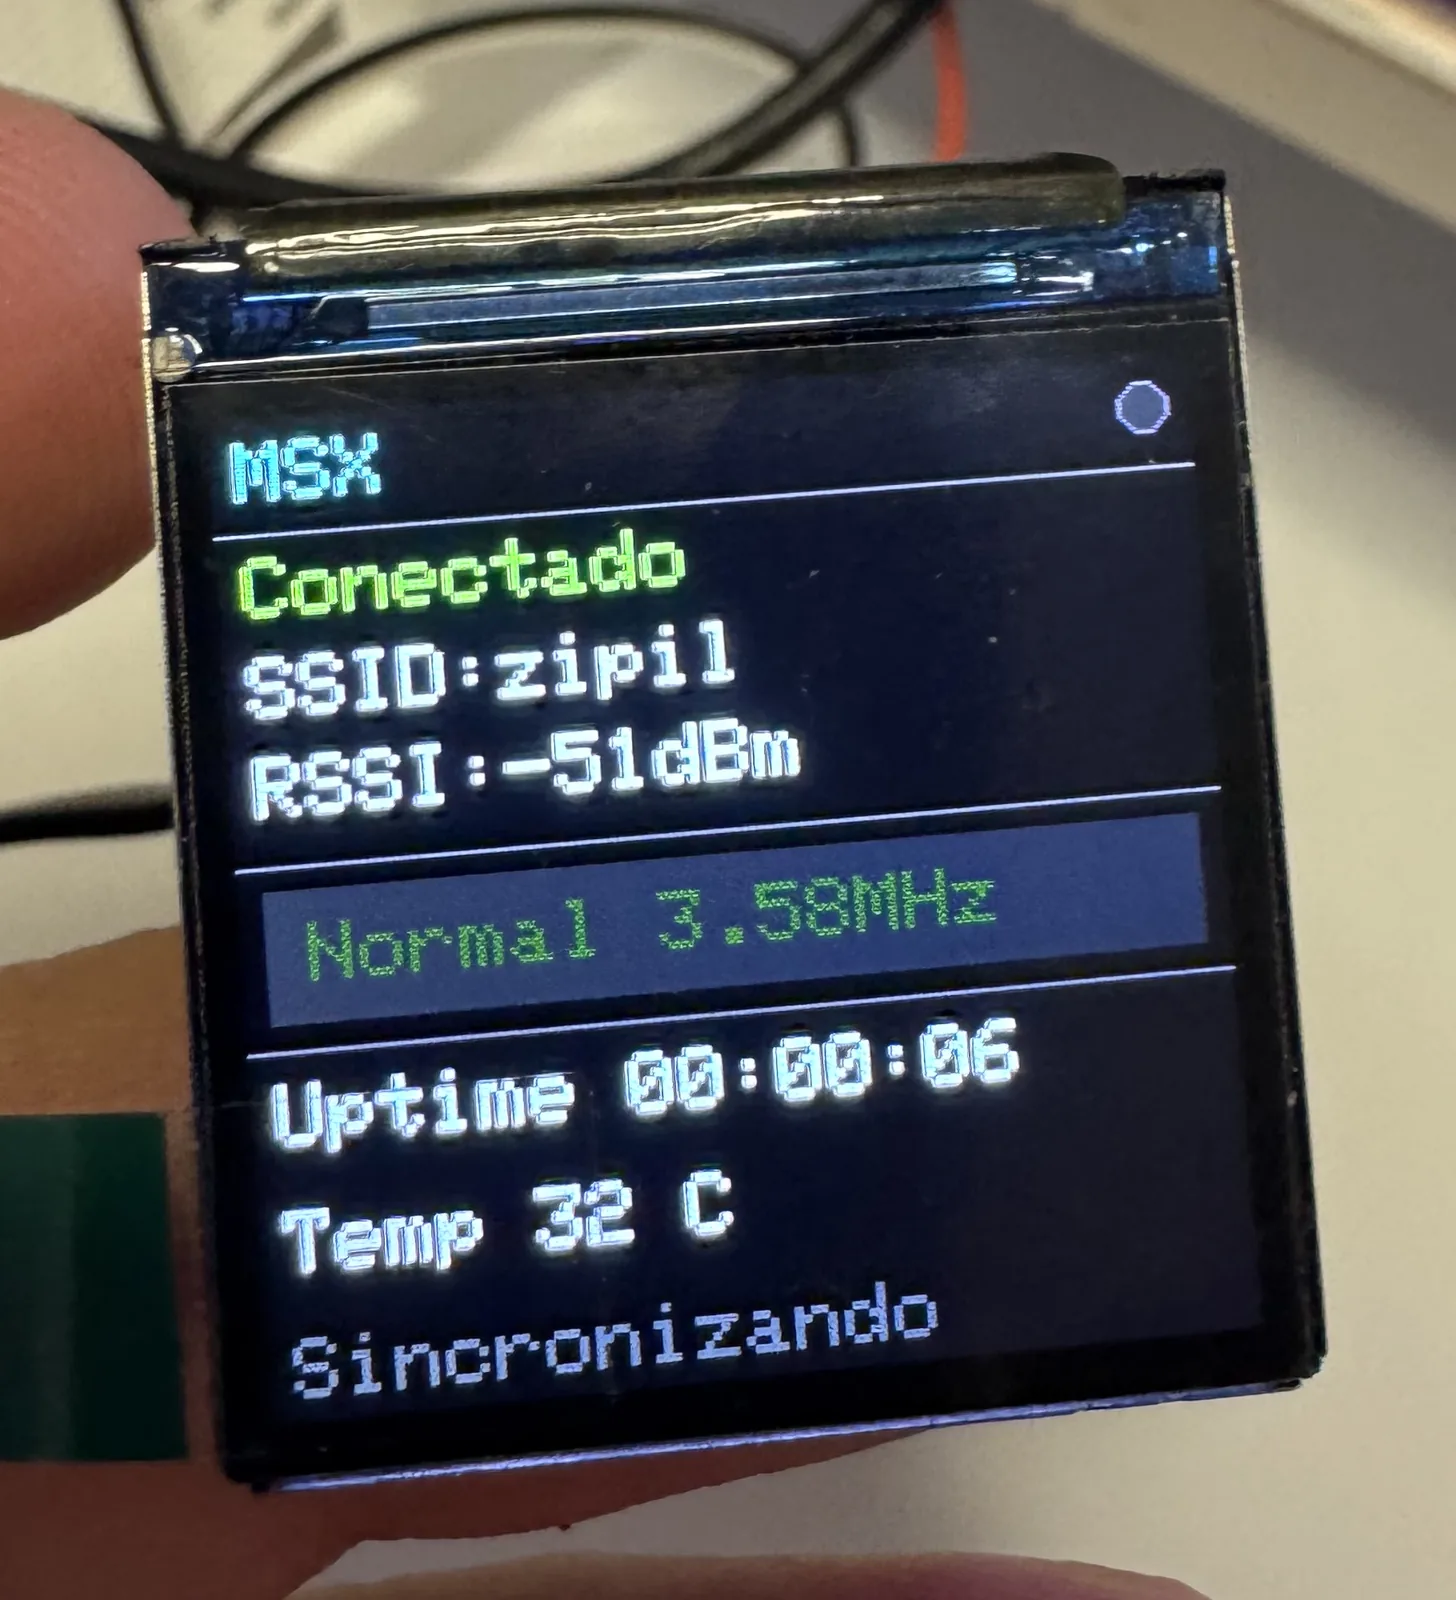
Las dos máquinas admiten un ESP32-C6 con pantalla de 240×240 que muestra el estado del WiFi, la hora y si el turbo está activo. En esta versión estrena el logotipo MSX armándose desde los dos lados, como en un MSX2 de verdad.
Si solo quieres WiFi y te da igual la pantalla, en el MSXnano sigue valiendo un ESP-01S, que es más barato y más pequeño.
⚙️ MSXimus v3.2
La Console 60K se pone al día con todo lo anterior: la BIOS única con el menú activable, las descargas desde el propio menú y el logo animado en la pantalla del C6. Y estrena también el pack con Nextor 3.0 beta 1, para quien quiera ir probando lo que viene.
💿 El pack de BIOS: dos versiones del mismo
El pack lleva dentro las ROMs de sistema del MSX y el kernel de disco Nextor. Hay dos versiones y solo cambia el Nextor:
| Pack | Nextor | Para quién |
|---|---|---|
pack_bios_<máquina>.bin | 2.1.4 | La estable. Es la que quieres salvo que sepas por qué no. |
pack_bios_<máquina>_nextor3.bin | 3.0 beta 1 | Para probar la beta de Nextor 3. Cambian cosas de fondo y no todo está rodado. |
⚡ Instalación
Todo va a la flash SPI de la placa con el Gowin Programmer, por el USB-C. Para cada fichero: operación de escritura en la flash externa (las opciones que empiezan por exFlash, no las de SRAM), el fichero en Programming File, y la dirección en el campo de dirección de inicio.
MSXnano (Tang Nano 20K)
| # | Fichero | Dirección | ¿Obligatorio? |
|---|---|---|---|
| 1 | msxnano_v2.0.fs | 0x000000 | Sí — es el core |
| 2 | Pack de BIOS | 0x200000 | Sí — sin él no arranca |
| 3 | rp2040_keyboard.uf2 | — | Sí, si quieres teclado |
El paso 3 no usa el Gowin: mantienes pulsado BOOTSEL, enchufas la Pico y arrastras el fichero a la unidad RPI-RP2 que aparece. Usa rp2040_keyboard.uf2 para la Waveshare RP2040-Zero (la habitual) o rp2040_keyboard_pico.uf2 para una Raspberry Pi Pico normal.
MSXimus (Tang Console 60K)
| # | Fichero | Dirección | ¿Obligatorio? |
|---|---|---|---|
| 1 | MSXimus_v3.2.fs | 0x000000 | Sí — es el core |
| 2 | Pack de BIOS | 0x400000 | Sí — sin él no arranca |
| 3 | yrw801.rom | 0x500000 | No — solo para MoonSound/OPL4 |
0x200000 en el MSXnano pero a 0x400000 en el MSXimus. Si cae en el sitio equivocado, la máquina arranca y se queda en negro, sin ningún mensaje que te lo diga.Y en el MSXimus, al terminar de grabar, apaga y enciende: un reset no basta, porque la DDR3 necesita recalibrar desde frío.
🔌 Conectar el ESP32-C6
Es opcional: sin él la máquina funciona igual, solo que sin WiFi. El módulo es una Waveshare ESP32-C6-LCD-1.3, y el firmware es el mismo binario para las dos máquinas. Cambian los pines de la FPGA.
En el MSXnano
| ESP32-C6 | Tang Nano 20K | Señal |
|---|---|---|
| GPIO17 (RX) | pin 27 | FPGA → C6 |
| GPIO16 (TX) | pin 28 | C6 → FPGA |
| GPIO3 | pin 29 | Indicador de turbo |
| GND | GND | Masa común |
Si prefieres el ESP-01S (solo WiFi, sin pantalla): su RX al pin 27, su TX al pin 28, más 3,3 V y masa.
En el MSXimus
Aquí va al conector J10, el 2×20 libre — el que el esquemático de Sipeed llama SDRAM1 CONN., no el que lleva el módulo de SDRAM que el core necesita.
| Pin J10 | Señal | ESP32-C6 |
|---|---|---|
| 11 | +5 V | 5V (tira derecha, el último) |
| 12 | GND | GND (tira derecha) |
| 14 | TX (FPGA → C6) | IO17, el RX del C6 (tira izquierda) |
| 16 | RX (FPGA ← C6) | IO16, el TX del C6 (tira izquierda) |
| 18 | TURBO (FPGA → C6) | GPIO3 (tira derecha, el primero) |
La alimentación sale del propio J10 (pin 11): el USB-C del C6 solo hace falta para grabarle el firmware — y mejor no tener las dos alimentaciones a la vez. TX y RX van cruzados, como siempre.
Grabar el C6: lo más fácil es esptool-js, el grabador web del propio Espressif, en Chrome o Edge: conectas por el USB-C del módulo, eliges el fichero, pones la dirección 0x0 y le das a Program. Sin instalar nada.
⌨️ Las teclas
Al encender
| Tecla | Qué hace |
|---|---|
| S | Ajustes — aquí se enciende y se apaga el menú |
| W | Configuración del WiFi |
| nada | Arranca el MSX (o el menú, si lo has activado) |
En el navegador de la tarjeta
| Tecla | Qué hace |
|---|---|
| Arriba / Abajo | Moverse (Izquierda / Derecha = página entera) |
| RETURN o botón A | Abrir carpeta o lanzar la ROM |
| BACKSPACE o botón B | Carpeta anterior |
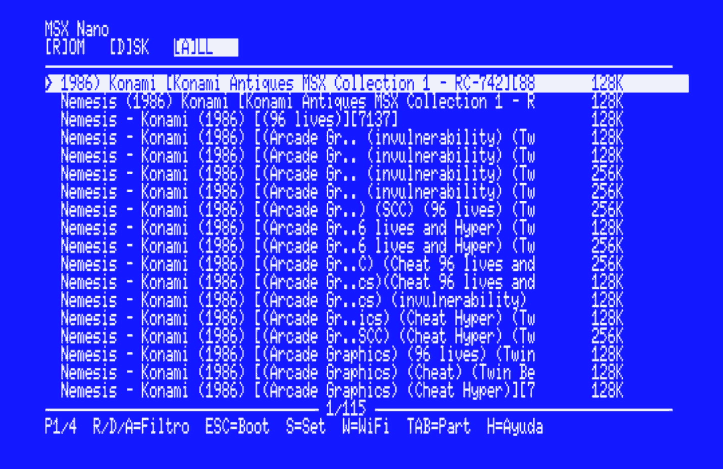
| R / D / A | Filtrar: solo ROM, solo DSK, o todo |
| TAB | Cambiar de partición |
| F | Buscar y descargar online |
| H | Esta misma ayuda, en pantalla |
| ESC | Salir al MSX / MSX-DOS |
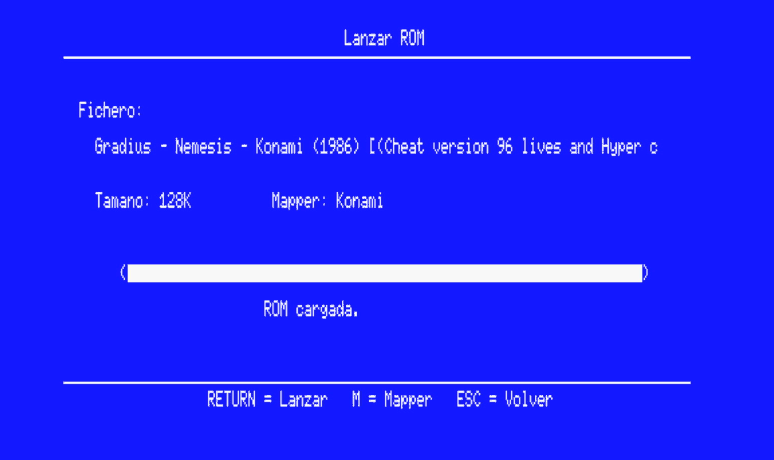
Al lanzar una ROM
RETURN lanza · M cambia el mapper si la detección no acierta · S activa la SRAM (solo en ASCII8/16) · ESC vuelve.
El teclado del MSXnano
Con la RP2040 nueva, las teclas especiales del MSX quedan así:
| Tecla MSX | En tu teclado USB |
|---|---|
| GRAPH | Alt izquierdo, o cualquiera de las dos teclas Windows |
| CODE / KANA | Alt derecho |
| STOP | F12, o Bloq Despl |
| SELECT | Fin |
| CAPS | Bloq Mayús |
| F6–F10 | F6–F10, que se mandan como MAYÚS+F1..F5 igual que en un MSX real |
El turbo ya no es una tecla: se activa desde Ajustes (Boot Turbo) o desde software, por los puertos Panasonic. En el MSXimus, además, F12 abre un panel de estado sobre la imagen, con el MSX congelado debajo.
📚 Dónde está cada cosa
Los README de cada repositorio son la documentación de referencia, y se han reescrito enteros para esta versión: fuera los historiales de fallos antiguos, dentro los pines y las instrucciones que hacen falta de verdad.
| Repositorio | Qué encontrarás |
|---|---|
| MSXnano | El core de la Tang Nano 20K, los tres cableados con sus pines, la tabla de flasheo y el mapa de teclado |
| MSXimus | El core de la Console 60K, el conector J10 al detalle, el panel de F12 y el V9968 |
| ESP32-for-FPGA | El firmware del módulo WiFi, común a las dos máquinas |
Todo es abierto: los cores bajo GPLv3 y el firmware del ESP bajo LGPL-2.1, derivado del excelente trabajo de ducasp.
👉 Descargas
🎉 Two new releases at once
MSXnano v2.0 and MSXimus v3.2 land on the same day, and that is no coincidence: from today both machines share the same BIOS and the same firmware for the WiFi module. Fix something in one, and it is fixed in the other.
New here? The MSXnano turns a Sipeed Tang Nano 20K into a full MSX2+, and the MSXimus does the same on the beefier Tang Console 60K. Z80, VDP with HDMI output, SCC and OPLL sound, an SD reader with Nextor and optional WiFi — all in real hardware, no emulator and no original MSX needed.
🕹️ MSXnano v2.0: the BL616 is out, an RP2040 is in
This is the headline. The USB keyboard and gamepads used to be served by the BL616 soldered onto the Tang Nano — and on boards made since 2024 (marked 3921) that chip often would not start: you were left with no keyboard and had to buy a separate M0S Dock.
That is over. An RP2040 (Pico Zero) now does the job over a single wire. Every board behaves the same, whatever year it was made.
And it brings what the BL616 never did: an MSX mouse. Plug a USB mouse into the Pico and MSX software sees a real MSX mouse.
🎛️ One BIOS, and the menu is a setting
This applies to both machines. There used to be two BIOS packs and you had to pick which one to flash: one booted straight into the MSX, the other brought the card browser. Changing your mind meant flashing again.
Now there is one, and that choice is a tick box:
- Power on and press S while the logo is showing.
- Tick «Menu al arrancar».
- Save & Restart.
Done. Untick it to go back to booting straight into the MSX. The choice is stored in the board’s flash, so it survives a power cycle.
📥 Downloading ROMs without a PC
With WiFi fitted and the menu on, key F opens the search: type a name, pick from the list, and the file lands straight on the microSD. No pulling the card, no switching on a computer.
🖥️ Optional screen, and a boot logo
Both machines accept an ESP32-C6 with a 240×240 screen showing WiFi status, the clock and whether Turbo is on. This release adds the MSX logo assembling from both sides, like a real MSX2.
If you only want WiFi and do not care about the screen, an ESP-01S still works on the MSXnano — cheaper and smaller.
⚙️ MSXimus v3.2
The Console 60K catches up with everything above: the single BIOS with its switchable menu, downloads from the menu itself and the animated logo on the C6 screen. It also gets the pack with Nextor 3.0 beta 1, for anyone who likes to try what is coming.
💿 The BIOS pack: two builds of the same thing
The pack carries the MSX system ROMs and the Nextor disk kernel. There are two builds and only the Nextor differs:
| Pack | Nextor | Who for |
|---|---|---|
pack_bios_<machine>.bin | 2.1.4 | The stable one. This is the one you want unless you know why not. |
pack_bios_<machine>_nextor3.bin | 3.0 beta 1 | To try the Nextor 3 beta. Deep things change and not everything is settled. |
⚡ Installing
Everything goes to the board’s SPI flash with the Gowin Programmer, over USB-C. For each file: a write operation on the external flash (the options starting with exFlash, not the SRAM ones), the file in Programming File, and the address in the start-address field.
MSXnano (Tang Nano 20K)
| # | File | Address | Required? |
|---|---|---|---|
| 1 | msxnano_v2.0.fs | 0x000000 | Yes — the core |
| 2 | BIOS pack | 0x200000 | Yes — it will not boot without it |
| 3 | rp2040_keyboard.uf2 | — | Yes, if you want a keyboard |
Step 3 does not use the Gowin: hold BOOTSEL, plug the Pico in and drag the file onto the RPI-RP2 drive that appears. Use rp2040_keyboard.uf2 for the Waveshare RP2040-Zero (the usual one) or rp2040_keyboard_pico.uf2 for a plain Raspberry Pi Pico.
MSXimus (Tang Console 60K)
| # | File | Address | Required? |
|---|---|---|---|
| 1 | MSXimus_v3.2.fs | 0x000000 | Yes — the core |
| 2 | BIOS pack | 0x400000 | Yes — it will not boot without it |
| 3 | yrw801.rom | 0x500000 | No — only for MoonSound/OPL4 |
0x200000 on the MSXnano but to 0x400000 on the MSXimus. Put it in the wrong place and the machine boots to a black screen, with nothing to tell you why.And on the MSXimus, once flashed, power cycle it: a reset is not enough, because the DDR3 needs to recalibrate from cold.
🔌 Wiring the ESP32-C6
It is optional: without it the machine runs just the same, only with no WiFi. The module is a Waveshare ESP32-C6-LCD-1.3, and the firmware is the same binary for both machines. Only the FPGA pins differ.
On the MSXnano
| ESP32-C6 | Tang Nano 20K | Signal |
|---|---|---|
| GPIO17 (RX) | pin 27 | FPGA → C6 |
| GPIO16 (TX) | pin 28 | C6 → FPGA |
| GPIO3 | pin 29 | Turbo indicator |
| GND | GND | Common ground |
If you prefer the ESP-01S (WiFi only, no screen): its RX to pin 27, its TX to pin 28, plus 3.3 V and ground.
On the MSXimus
Here it goes to the J10 header, the free 2×20 — the one Sipeed’s schematic calls SDRAM1 CONN., not the one carrying the SDRAM module the core needs.
| J10 pin | Signal | ESP32-C6 |
|---|---|---|
| 11 | +5 V | 5V (right strip, the last one) |
| 12 | GND | GND (right strip) |
| 14 | TX (FPGA → C6) | IO17, the C6’s RX (left strip) |
| 16 | RX (FPGA ← C6) | IO16, the C6’s TX (left strip) |
| 18 | TURBO (FPGA → C6) | GPIO3 (right strip, the first one) |
Power comes from J10 itself (pin 11): the C6’s USB-C is only needed to flash its firmware — and it is best not to have both power sources connected at once. TX and RX go crossed, as always.
Flashing the C6: the easy way is esptool-js, Espressif’s own web flasher, in Chrome or Edge: connect over the module’s USB-C, pick the file, set the address to 0x0 and hit Program. Nothing to install.
⌨️ The keys
At power-on
| Key | What it does |
|---|---|
| S | Settings — this is where you turn the menu on and off |
| W | WiFi configuration |
| nothing | Boots the MSX (or the menu, if you enabled it) |
In the card browser
| Key | What it does |
|---|---|
| Up / Down | Move (Left / Right = a whole page) |
| RETURN or button A | Open folder or launch the ROM |
| BACKSPACE or button B | Parent folder |
| R / D / A | Filter: ROM only, DSK only, or everything |
| TAB | Switch partition |
| F | Search and download online |
| H | This same help, on screen |
| ESC | Exit to MSX / MSX-DOS |
When launching a ROM
RETURN launches · M changes the mapper if detection got it wrong · S enables SRAM (ASCII8/16 only) · ESC goes back.
The MSXnano keyboard
With the new RP2040, the MSX special keys map like this:
| MSX key | On your USB keyboard |
|---|---|
| GRAPH | Left Alt, or either Windows key |
| CODE / KANA | Right Alt |
| STOP | F12, or Scroll Lock |
| SELECT | End |
| CAPS | Caps Lock |
| F6–F10 | F6–F10, sent as SHIFT+F1..F5 exactly as on a real MSX |
Turbo is no longer a key: set it in Settings (Boot Turbo) or from software through the Panasonic ports. On the MSXimus, F12 also opens a status panel over the picture, with the MSX frozen underneath.
📚 Where everything lives
Each repository’s README is the reference documentation, and all of them were rewritten for this release: out went the old bug histories, in came the pins and the instructions you actually need.
| Repository | What you will find |
|---|---|
| MSXnano | The Tang Nano 20K core, all three wirings with their pins, the flashing table and the keyboard map |
| MSXimus | The Console 60K core, the J10 header in detail, the F12 panel and the V9968 |
| ESP32-for-FPGA | The WiFi module firmware, shared by both machines |
All open source: the cores under GPLv3 and the ESP firmware under LGPL-2.1, derived from the excellent work of ducasp.
👉 Downloads